At Tengio we are investing a lot of time and resources to explore Virtual Reality. We have made apps and games for Cardboard, Daydream and we are working on Oculus. However, one platform that I think we worked comparatively little on, despite its importance, is the web. Fortunately, this is going to change soon. As a matter of fact, we have started to look at technologies and possibilities that WebVR can offer to our team and clients.
In this blog I will share some information that we collected on WebVR in general and A-Frame in particular.
WebVR overview
WebVR is an experimental JavaScript API that provides access to Virtual Reality devices in your browser.
The devices are:
- Oculus Rift
- HTC Vive
- Samsung Gear VR
- Google Daydream
- Google Cardboard
To see the details of the API you can have a look at the W3c draft. The webvr.rocks is also very useful to see the status of each browser and if it supports WebVR applications.
As for other APIs, you can always use the polyfills WebVR-polyfill to make your VR page available on older browsers.
These are the best tools to work with VR on the web:
- WebVR from Chrome team;
- A-Frame from Mozilla.
At the moment, the best solution to build a VR experience on the web is A-Frame.
What is A-Frame
A-Frame is a web framework used to build virtual reality experiences. It was created by Mozilla VR to make WebVR content creation easier, faster, and more accessible.
A-Frame lets you build scenes with HTML while giving you unlimited access to JavaScript, three.js, and all existing Web APIs. A-Frame uses an entity-component-system pattern that promotes composition and extensibility. It is free and open-source with a welcoming community and a thriving ecosystem of tools and components.
A-Frame Simple example
There is very little you need to know to be able to build the first VR scene on you webpage.
Firstly, make sure to add
<script src="https://aframe.io/releases/0.5.0/aframe.min.js">
</script>
to the head of your HTML page, to avoid getting this error message:
Put the A-Frame script tag in the head of the HTML before the scene to ensure everything for A-Frame is properly registered.
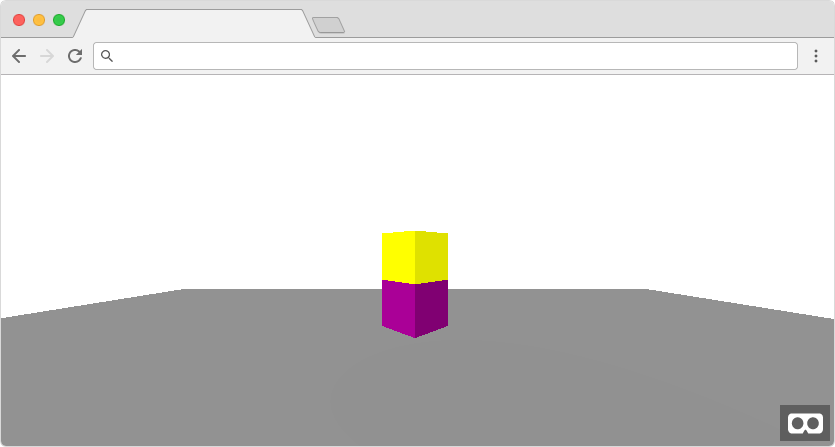
In the body of the page write the following:
<a-scene embedded example1>
    <a-box color="purple" position="0 0.5 -5"
        depth="1" height="1" width="1" rotation="0 45 0">
    </a-box>
    <a-box color="yellow" position="0 1.5 -5"
        depth="1" height="1" width="1" rotation="0 45 0">
    </a-box>
    <a-plane color="grey" height="20" width="20" rotation="-90 0 0">
    </a-plane>
</a-scene>
NOTE: I have included only one working a-scene because it is not possible to have multiple a-frames in the same webpage. To have more than one scene, you need to use iframes. This issue offers more information about this.
The getting started page is a more detailed tutorial.
Embedding the frame
Normally the a-scene takes the whole screen. If you don’t want this to happen, or you prefer to confine the VR element in a specific space, you need to wrap it in a div and add the attribute embedded:
<div>
    <a-scene embedded>
        <a-box color="purple" position="0 0.5 -5"
            depth="1" height="1" width="1" rotation="0 45 0">
        </a-box>
        <a-box color="yellow" position="0 1.5 -5"
            depth="1" height="1" width="1" rotation="0 45 0">
        </a-box>
        <a-plane color="grey" height="20" width="20" rotation="-90 0 0">
        </a-plane>
    </a-scene>
</div>
You can also add a style such as width, height etc. to the div of the a-scene you want to create.
Loading resources
The default way to define resources in a a-scene is with the a-assets tag.
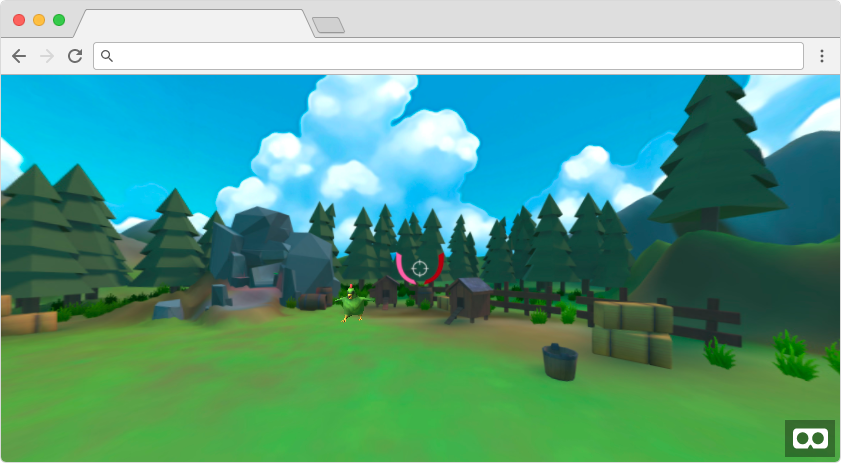
Here is an example with the skybox:
<a-scene embedded>
    <a-assets>
        <a-asset-item id="sky" src="/img/blog/0017/oz_single.jpg">
        </a-asset-item>
    </a-assets>
    <a-sky src="#sky"></a-sky>
</a-scene>
This is actually a 360 image from our VR game Oz Chicken Slayer, but it is still useful to show how it works.

Animations
With A-Frame you can also animate objects. Let’s say we want our cylinder to rotate:
<a-cylinder color="yellow" position="3 1.76 6.8"
    depth="1" height="4" width="1" rotation="0 45 0">
    <a-animation attribute="rotation"
        dur="10000" to="180 0 0" repeat="indefinite">
    </a-animation>
</a-cylinder>
Furthermore, you can animate the camera object. Here’s an example:
<a-entity camera>
    <a-animation attribute="rotation" dur="2000"
        fill="forwards" to="0 360 0" repeat="indefinite">
    </a-animation>
</a-entity>
See some more examples here.
A-Frame inspector
A very handy tool linked to A-Frame is the Inspector. To use it you have to add the inspector attribute to the a-scene tag as follows:
<a-scene inspector="url: https://aframe.io/aframe-inspector/dist/aframe-inspector.js">
This uses the latest version of the inspector which is 0.5.1.
Now you can start the inspector with the shortcut ctrl+alt+I. The inspector has several features and you can find out a bit more about them here.
To update your a-scene, simply copy the changes you made in the inspector directly into your HTML page.
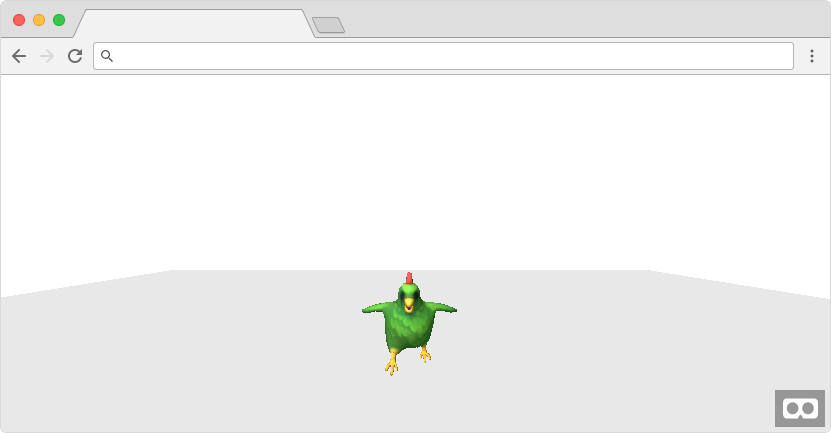
Adding objects from Blender
Another interesting aspect of a-frame is that it allows the integration of objects from a variety of sources such as Blender, from which you can export obj/mtl, collada/dae and fbx files.
<a-scene embedded>
    <a-assets>
        <a-asset-item id="chicken-obj" src="/img/vr/chicken.obj">
        </a-asset-item>
        <a-asset-item id="chicken-mtl" src="/img/vr/chicken.mtl">
        </a-asset-item>
    </a-assets>
    <a-entity obj-model="obj: #chicken-obj; mtl: #chicken-mtl;"
        position="0 0 -3" rotation="0 -180 0">
    </a-entity>
    <a-plane color="#ccc" height="20" width="20" rotation="-90 0 0">
    </a-plane>
</a-scene>
You can also compose a a-scene using, for example, both your object and the skybox.
<div style="width:100%; height:50vh">
    <a-scene embedded example1
        inspector="url: https://aframe.io/aframe-inspector/dist/aframe-inspector.js">
        <a-assets>
            <a-asset-item id="sky" src="/img/blog/0017/oz_single.jpg">
            </a-asset-item>
            <a-asset-item id="chicken-obj" src="/img/blog/0017/chicken.obj">
            </a-asset-item>
            <a-asset-item id="chicken-mtl" src="/img/blog/0017/chicken.mtl">
            </a-asset-item>
        </a-assets>
        <a-sky src="#sky"></a-sky>
        <a-entity obj-model="obj: #chicken-obj; mtl: #chicken-mtl;"
            position="-2 0 -7" rotation="0 -180 0">
        </a-entity>
    </a-scene>
</div>
If you are interested in exploring different a-frame components you can try to implement the fog, just by adding it directly to the a-scene tag:
<a-scene fog="type: exponential; color: grey">
</a-scene>
Additional information on the properties of the fog component, can be found here.
Importing animated objects
There is not much documentation on how to import animated objects in a WebVR environment. I tried a few different things and the one that seems to work is the json-model file.
NOTE: Unfortunately fbx, that support animations, is still experimental and only support ASCII format 7. Blender exports to ASCII 6.1 or Binary 7.
First, we need to get some extra help from aframe-extras.
<script src="//cdn.rawgit.com/donmccurdy/aframe-extras/v3.3.1/dist/aframe-extras.min.js">
</script>
With this script we can load and animate a json-model and the animation-mixer:
<a-scene embedded example1
    inspector="url: https://aframe.io/aframe-inspector/dist/aframe-inspector.js">
    <a-entity animation-mixer json-model="src: url(/img/blog/0017/wolf.json)"
        position="0 0 -7" scale="0.035 0.035 0.035" rotation="0 -90 0">
    </a-entity>
    <a-plane color="#ccc" height="20" width="20" rotation="-90 0 0">
    </a-plane>
</a-scene>
NOTE: The wolf’s model also comes from aframe-extras.
Conclusion
A-Frame is a very easy and simple way to add a VR experience to the web. Considering that it is still at version 0.5.0 it is very well conceived and the idea to expose elements through html makes it approachable.
Finally, but most importantly, A-Frame doesn’t limit you in any way. You can use any js framework you want in combination with it and you can access the underline Three.js api.