
Crossing realities tutorial summary
- The beginning of a VR journey
- Baby steps into VR
- Ready to Daydream!
- Tips & Tricks
- To the store!
Introduction
A few months back I started a fantastic journey by diving into Virtual Reality. It happened quite casually, I was peacefully minding my how business when someone put a VR headset in my hands. I don’t recall where it happened, probably at a meetup. But I do recall that the first thing I thought was “Wow, this is awesome!”, which also happened to be the second and third things I thought. Actually I still think that way right now. Based on this I started to wonder “Maybe I could be part of this awesomeness?” which quickly became a “Yes I can!” (I definitely didn’t steal that quotation from a famous personality… maybe). So I started to read what I could find about VR, including the various headsets of the moment. And the Google Cardboard looked like the perfect tool for the beginner I was. It’s totally inexpensive, easy to carry around and still produces good results, exactly what you need to start playing around! So I took a look at the API and several SDK were available, one for Android, one for IOS and one for Unity. The latest caught my attention, I had already tested Unity about two weeks before and had loved the experience. That’s when the picture got clearer: VR = awesome, Unity = awesome, so VR + Unity = double awesome! That’s where my journey started, and from there it only got awesomer (yes, it’s so awesomingly awesoming that I need to create new words to carry the awesomishness)!
Pack up the gears for your VR trip
The two main things you need to start developing VR apps are a Cardboard headset and Unity. You can get the first one for less than 10$ by ordering online and the second one for free.
Choosing your weapon:
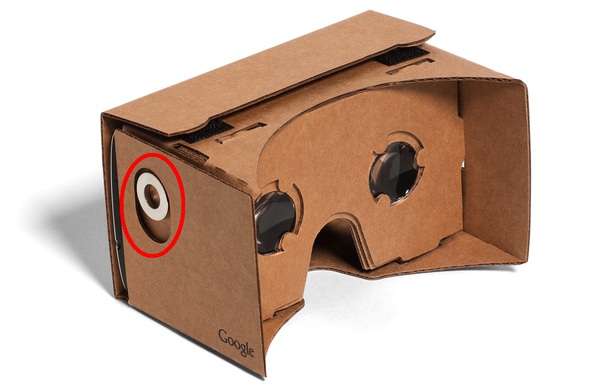
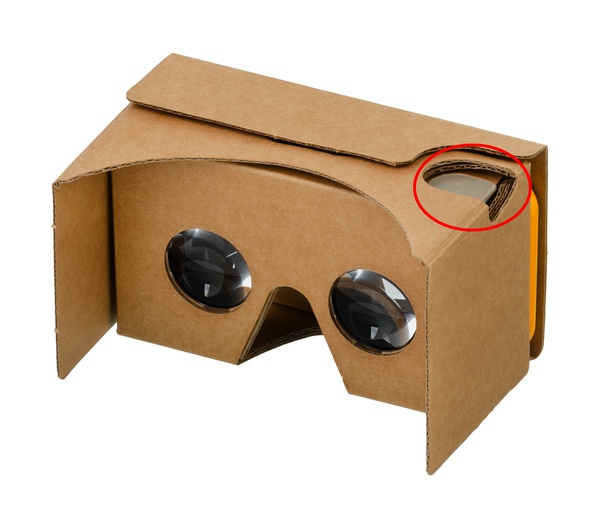
When choosing your Cardboard make sure that your model either has a magnetic trigger or a hole that lets you tap on the screen. Some Cardboard models don’t have any of those which limits a lot the possible in-game interactions. Also check that it has a QR code. This QR code contains information to correct the distortion induced by the lenses.
Unity setup
Install Unity
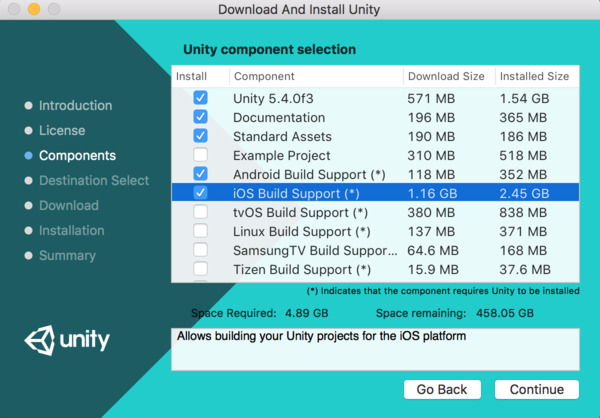
To get Unity just go on the official website and download the “Personal” edition. When installing you will be asked which components you’d like to install, I use an Android phone for my builds so I tick the “Android Build Support” checkbox. If you want to build your apps for IOS tick “iOS Build Support”.
While Unity is installing you can create your compulsory Unity account. If you are new to Unity I highly recommend going through the “Roll-a-ball” tutorial. It’s not VR but it’s a really great tutorial and it will teach you the basis of both the interface and the logic of Unity. And at the end you will be proud to have your very first Unity game!
Setup Unity for Google Cardboard
The first thing you need to do is download and install the required components to build on your target platform (here Android or IOS). This is not specific to VR, but since you will install your app on a device you need those components. The procedure is not the same for IOS and Android. I mostly build for Android, so I will focus on this platform. But, apart from the initial setup and final build steps, there should only be small differences.
The documentation for the Cardboard API is available on Google developers website. Follow the instructions on the Get Started section for the platform you are targeting. Once you’ve gone through the boring prerequisite parts the fun begins and you can import and test the demo scene by following the instructions! Once you’ve hit the “Play” button you should see something like this:
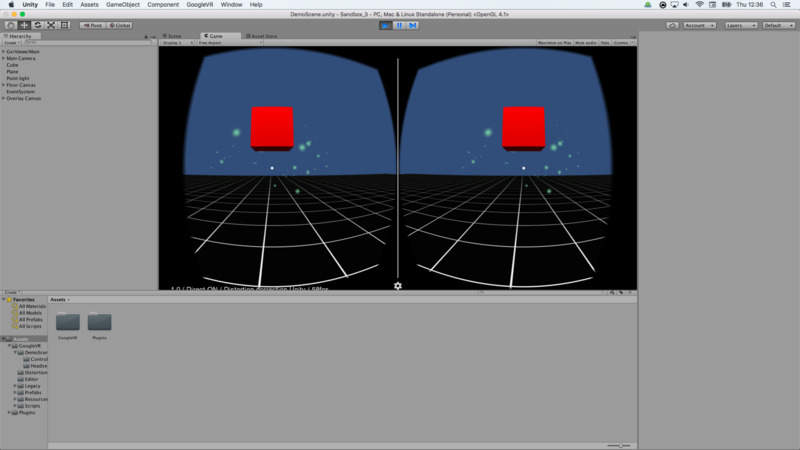
If your screen size is big enough I recommend changing the layout of Unity to 2 by 3, this way you can still see the scene view when the emulator is running. To do so click on the top right button (labelled Default) and select 2 by 3. You should now see this:
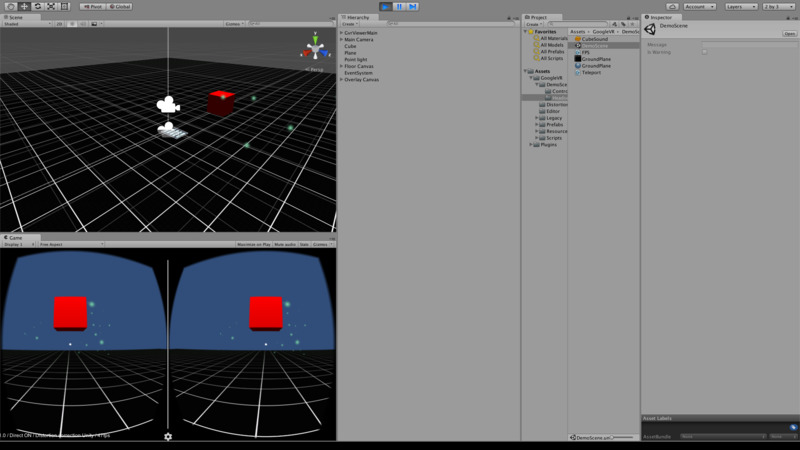
Congratulations! Your first VR app is ready to run! Now follow Google’s instructions to build it to your device. Once this is done the app should start automatically, place the device in your Cardboard and look around. This is VR!
So, if you are still here it means that you went through the boring but necessary part of setting up your dev environment, that’s great! And you have your first VR app! Sure it doesn’t do much right now, you can just look around and press the trigger. But that’s a good start!
Now that we are all set we can actually start our journey in the heart of VR. And for this we will need to learn how to walk (and then run if we feel like it!). So the next section will be about the various ways you can move around in VR with a Cardboard.
